April FREE Printable

Dress up your home with this perfect spring print!

Fiddle Leaf Fig

See how to style your fiddle leaf fig!

Coconut Lazy Day Cake

Try this fast and easy recipe this week!

DIY Chunky Knit Throw

Learn how to create this cozy throw for your home!

Mini Living Room Makeover

A makeover shopping your own home!

Aug 1, 2016

August Issue is LIVE!


Click HERE to read the June issue!

Our August issue of Everything Home Magazine is now live! This edition is chock full of wonderful neutral summer decor ideas, DIY projects, tablescape ideas, photo tips, DIY floral arranging for a wedding and more!

 Grab a cup of coffee and enjoy!


 * Be sure to stop by & visit our official magazine sponsors Painted Fox  & LexMod FurnitureCanvas HQ. 

Jul 30, 2016

EH August FREE Printable!

Click HERE to print in PDF full version!

This issue of Everything Home Magazine is all about celebrating the neutral shades, bright whites, and natural light. There is something about this home trend that is very peaceful and inviting. To help you incorporate these colors into your home, we’ve taken one of our most popular prints and changed the colors to blend into your neutral or bright white space. We can’t wait to see how you style these!
Please remember to tag any photos of your printable using the hashtag #EHprintable for a chance to be featured on the Everything Home Magazine Instagram account.

Free Printable Created by: Jennifer Reed

Jul 17, 2016

Farmhouse Table: Getting the chippy look from Sugar & Succulents


Good morning everyone! Today I'm finally going to explain the process of turning our recently built farmhouse table into the finished one we are in love with today!
As you may have read, we built this farmhouse table:

finished table, DIY, farmhouse
I thought about leaving the natural wood, but my heart was set on black chairs with a white table. I wanted that older look, so I went with Miss Mustard Seed's milk paint in farmhouse white. 
The first coat went on with minimal coverage- the wood looked whitewashed as opposed to painted.
whitewash, wood, milk paint,
I did love the wood showing through, the character of the uneven strokes, and the charm brought out from the nicks and dents. I then added a second coat.
second coat, paint, milk paint, coverage
The second coat definitely added more coverage, but I wasn't getting the chippiness I was looking for.
I think because my pieces are usually new wood or sanded down, I don't get those gorgeous cracks and chips that milk paint is famous for. I was disappointed, but determined! I looked up some "recipes" online of how to get paint to crackle. I found there are mediums specifically for that purpose, but with such a large table I didn't want to invest in an expensive paint additive and then not get the results I was looking for. 
I went with the cheap alternative: children's school glue and chalk paint. The process is simple.
dried paint, milk, milkpaint
Once the original layer of paint has dried, add a thick layer of glue. I used a cheap paintbrush. 
child glue, children, elmer, school,
Let the glue dry to a tacky consistency. If the glue gets too dry the process won't work, but if it's too wet I had trouble painting on top of the glue. It's not an exact science, just a little guess work. Then I used pre-mixed chalk paint for the next layer. I chose chalk paint instead of milk paint for a few reasons.
chalk paint, drying, chip, chipping, texture

I wanted to keep the table white, but I knew I needed a different shade or type of white to see the cracks and chips correctly. My concern with using the milk paint was that I wouldn't be able to see these perfect imperfections. I was also running low and didn't want to keep mixing up new batches- especially when I wasn't sure how it would react with the glue. 
After I painted on a thick layer, I left it alone to dry. The image below is after 1 hour of drying time. You can see there are still wet areas and bubbles.
drying, crackle, chippy, paint
I decided to leave the table to dry overnight. In the morning, I had this perfect chippy cracked goodness:
perfect, chippy, chipped, cracked, glue,
(all of the heart eye emojis here).
I did the table in parts, so you can really tell difference before and after on this junction of the leg and sideboard.
difference, painting, technique, chippy, milk, chalk
I finished the whole table and I was starting to really love the look of it; but as always, I wanted MORE. I almost thought the chipping and cracking looked too uniformly done.
chippy, perfect, leg, table, finished
I brought out my favorite little sander and went to town chipping off large chunks of paint and distressing the table. When I finally finished sanding, I took Miss Mustard Seed's Tough Coat and covered the table in two coats. This coating is protective against water and food, but also has a matte finish. I wanted to use a matte finish to cut the shine from the glue, so this seemed like the perfect solution.
top coat, tough coat, miss mustard seed
After the first coat, I waited 2 hours and added a second coat. While applying, it looks a little milky white but dries clear. 
chipped perfection, table, chippy, milk paint, chalk,
Y'all, I am IN LOVE with this finished product. This table was definitely a labor of love, but every step was important. I'm so happy we decided to stain it before painting; you can see here the layers of the stain and wear on the wood. The two different shades of white added to the effect of an older table with multiple coats of paint over the years. 
finished table, love, gorgeous, galvanized cloche, farm, farmhouse, house
finished, done, table, complete, DIY, farm, house, farmhouse, milk, chalk, paint

I'd love to hear your thoughts! Have you painted a table with so many steps and layers? Will you attempt after this DIY lesson? Let me know in the comments!

**Blog post courtesy of Taylor from Sugar and Succulents

Jul 1, 2016

Everything Home Magazine: July Issue!


Click HERE to read the July issue!
Our July issue of Everything Home Magazine is now live! This edition is chock full of wonderful summer decor ideas, DIY projects, tablescape ideas, a new floral arranging column and more!

 Grab a cup of coffee and enjoy!

 * Be sure to stop by & visit our official magazine sponsors Painted Fox  & LexMod FurnitureCanvas HQ !


Jun 30, 2016

EH July Free Printable!


What better way to add a touch of nautical beach fun to your home than with a shades of blue, anchors and scripture! This print is a great representation and daily reminder of Gods goodness and His promises for you. Hope truly does anchor the soul. We can’t wait to see how you style these in your home!

Please remember to tag any Instagram photos of your printable using the hashtag #EHprintable for a chance to be featured on the Everything Home Magazine Instagram account.

Click here to download this gorgeous printable to display in your home!
Printable created by: Jennifer Reed!

Jun 1, 2016

June Issue is Live


Click HERE to read the June issue!

Our June issue of Everything Home Magazine is now live! This edition is chock full of wonderful summer decor ideas, DIY projects, tablescape ideas, a new floral arranging column and more!

 Grab a cup of coffee and enjoy!

 * Be sure to stop by & visit our official magazine sponsors Painted Fox  & LexMod FurnitureCanvas HQ &  Love with Food !


May 31, 2016

June FREE Printable!


Summer is the season when we typically want life to slow down. We want to make memories and savor every second of life with our children, family, and friends. This print is a reminder for you to enjoy the little things. We wish you a wonderful summer full of love!

Please remember to tag any Instagram photos of your printable using the hashtag #EHprintable for a chance to be featured on the Everything Home Magazine Instagram account.

Click here to download this gorgeous printable to display in your home!
Printable created by: Jennifer Reed!


May 1, 2016

May Issue is LIVE!


Click HERE to read the May  issue!

Our May issue of Everything Home Magazine is now live! This edition is chock full of wonderful "makeover"  decor ideas, DIY projects, tablescape ideas, a new floral arranging column and more!

 Grab a cup of coffee and enjoy!

 * Be sure to stop by & visit our official magazine sponsors Painted Fox  & LexMod Furnitureand Canvas HQ!


Apr 30, 2016

Al Fresco Dining!


Warmer weather is here and everyone is thinking of ways to get outdoors and enjoy! Why not host your family dinner "Al Frersco" style?

Our resident tablescape expert, Oscar Bravo shares some fun and easy ideas that you can try this weekend at your own home! Check out page 60 of our April issue for more details and "how-to's".


May FREE Printable!


This issue is all about makeovers and bringing rooms and spaces in our homes back to life! After we give our home a little TLC we always tend to want to stay home and enjoy it. So, with that, I feel like this “Let’s Stay Home” print is the perfect thing to add to that newly made-over space!
Please remember
to tag any photos of your printable using the hashtag #EHprintable for a chance to be featured on the Everything Home Magazine Instagram account.

  
Click here to download this gorgeous printable to display in your home!
Printable created by: Jennifer Reed!


Apr 20, 2016

LexMod & Canvas HQ GIVEAWAY!!!!


We love our official magazine sponsors & love it even more when they team up for a fun giveaway for YOU!  Head on over to @lexmodfurniture to learn how you can win this @canvas_hq beauty!
 
This gorgeous peach tree blossom canvas measures 30" tall ($163.95 value!) This would be the perfect addition to any gallery wall, just in time for spring 🌸
 
Giveaway ends April 24th.....good luck to everyone!

Coconut Lazy Day Cake


There is one ingredient that I regrettably tend to forget about. I always have it on hand in my freezer, but I never think to use it…
Coconut.
I don’t know why I don’t think of it because I do love it…but it’s always such a special treat when I finally pull it out of the freezer and throw it on a cake, or cookies… or a bunch or two…or three… straight to my mouth.
And I like it simple. If I’m going to eat coconut, I want it to be the star of the show, not some back up singer to pineapple or banana, you know? So a simple white cake with a sugar glaze, topped with plain coconut is just fine by me!


This recipe is just the simple Busy Day Cake adapted from the Better Homes and Gardens cookbook. I’ve changed it up (of course) to suit my taste, because I found that if I use the full 2/3 cup of sugar that it calls for in the book, it is way too sweet. Again, let the coconut be the star of the show, and it’s natural sweetness shines with this not too sweet cake. The sugar glaze gives a fun initial crunch before sinking into the moistness of the cake!
This Coconut Lazy Day Cake is truly one of my favorites. And it lives up to its name, Lazy Day Cake, because it is such a quick and easy cake, it’s perfect for those days when you want cake, but don’t want to commit to the time and effort for it, because you don’t have the time… or like me… you’re just feeling lazy. And that’s definitely okay with me.

Head on over to Prudy's blog to print the full COCONUT LAZY DAY CAKE recipe!

Apr 17, 2016

DIY: Cottage/Farmhouse Chippy Mirror Frame


Hi!! I’m Taylor and I run a little store/blog called  sugar & succulents.

I absolutely love the modern-farmhouse/cottage style. I've been acquiring pieces and staging my decor to add that delightful southern charm to my home. We recently moved into a new place and I've been quickly filling it up with decor pieces that I love. Some items came with us, others were found and foraged from my hours spent at antique stores and flea markets, but this mirror found me in a really cool salvage/thrift shop called Construction Junction in Pittsburgh, PA. 

I say "it found me" because I had no intention of purchasing a mirror that day. I went shopping the first week of March, right before we were moving out of the area. I was walking around looking for structural pieces and large furniture to take with us, when it jumped out and said "Taylor take me home!!" (okay, not literally, I know mirrors don't talk, but it did speak to my soul, if you know what I mean). How could I say no? It was real wood, heavy, and oh my goodness those curves!
...$20 later and it was coming home with me for a makeover. 

The mirror got packed up and unpacked into our new bedroom, where it found a home on the floor in the corner. I left it there while I worked on some other projects, including this simple ottoman I made and these dining chairs I refinished. Fast forward to this Friday, when I decided it was finally time for the makeover party:

I gathered my materials:
  • The gorgeous mirror
  • Rags
  • Newspaper
  • Miss Mustard Seed’s Milk paint in Farmhouse White
  • Miss Mustard Seed’s Bonding Agent
  • Paint brush
  • Small cup for mixing lender, water
  • Blender
  • Water
  • Painter’s tape
  • Hair dryer
  • Extension cord
  • Sander and medium grit sand paper 


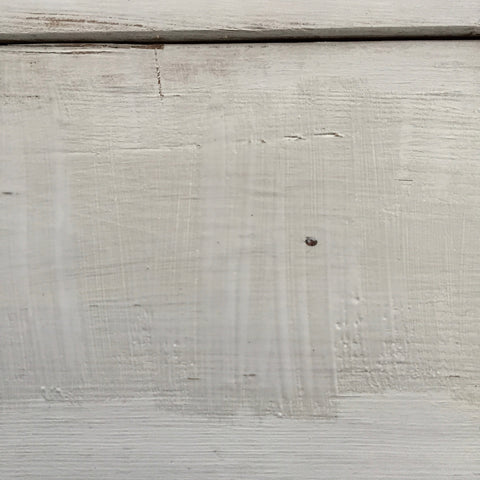
I took my mirror to the kitchen where I used a rag to wipe down the wood frame. This helped get the dust off and made sure the paint had a clean surface to adhere to. Then I moved the mirror outside and laid it down on top of some newspaper.


While the frame was drying, I mixed up some milk paint. If you’ve never worked with milk paint before, it is amazing- you’ll love it! Not only is it nontoxic, it comes in a powder form that's easy to store. To be honest though, I really hate mixing it. For my last project I mixed it by hand with a paint-stick and it took a long time and I couldn't get all the lumps out. I decided this time to use my blender; which also turned out to be a terrible idea (foreshadowing).

Once I had my paint mixed, I added the bonding agent. This is an important step if you're painting on anything other than untreated wood and you don't want to take the time to sand or strip the surface. As per the directions, I mixed equal parts milk paint and bonding agent and took it outside.


I taped the edges of the mirror so that I wouldn’t get paint on the glass; but in hindsight I wish I would have taped newspaper to the glass too or covered the whole thing in the painter's tape. While I was brushing the paint onto the frame, little flecks were landing on the mirror for me to clean up later. An even better solution would be to remove the frame from the glass, if possible. Unfortunately on this mirror, the back was permanently attached and I didn't want to risk ruining the whole piece by trying to pry it off. 


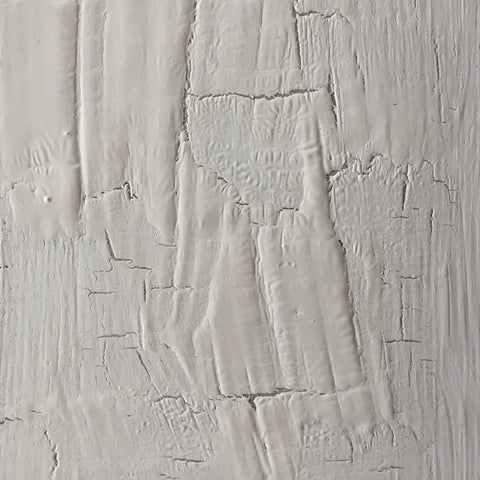
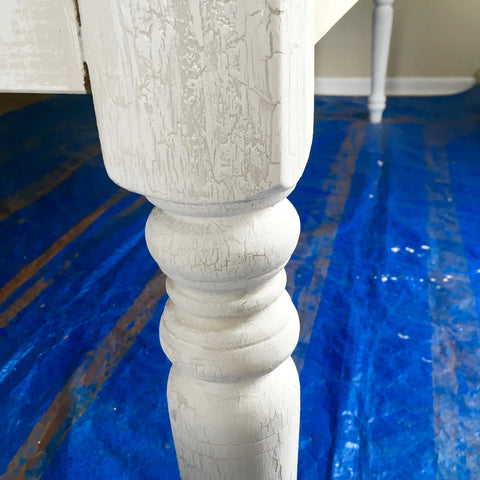
I painted my first layer of paint. Milk paint feels thin but goes on nicely and I was happy with the coverage for the first coat. I used my hair dryer on hot all along the mirror to create a “chippy” look, but I knew the paint underneath was not fully dry. To let the bonding agent set, I planned to let it dry for two hours. 

I went back inside to clean up my milk paint mess only to find that the paint was sticking to the blender. I was having a really hard time washing it off. I took the blender apart and was able to scrub out the pitcher using a scrubby pad, but it also left little scratches on my pretty glass blender. 


Then I tried to clean the paint off the blade using a brush, and as you could probably guess, moments later sliced a nice gash in my finger. 

Finger cuts bleed a lot, you know, like a whole-roll-of-paper-towels-while-asking-google-how-to-stop-the-bleeding lot. Ended up with a quick (read: hour long) trip to Patient First where they were able to get it under control; I didn't even need stitches! 


Okay, where were did I leave off?


Back at home, the mirror had dried so I added my second coat. Then we went out for Japanese because I didn't feel like cooking with only my left hand. After dinner I moved the mirror into the garage for the night. Saturday morning I looked at it; the mirror definitely needed a third coat.  At this  point I started contemplating if I should have sanded it down to the natural wood underneath, but third time's a charm. 


I painted it in the sun, and used my hairdryer for a longer period of time. I painted small sections and then blasted them with heat to get a very heavily aged-look of cracked layered paint. I set my timer for two more hours and let it dry. (The light you see in the photo was attached to the extension cord I was using, it was not used for this project.)


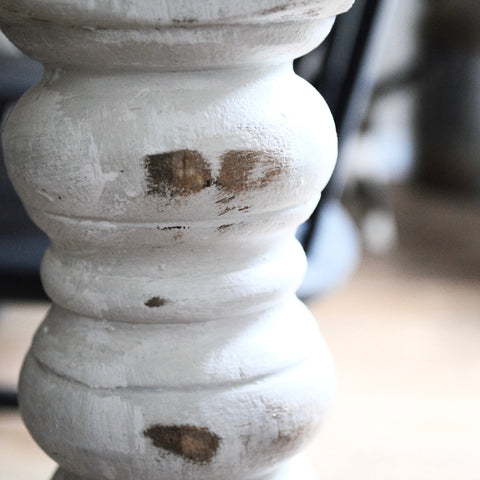
At this stage, I was really loving the level of coverage and the layered look of the paint, so I pulled out my little mouse sander with a medium grit (80) sandpaper. 


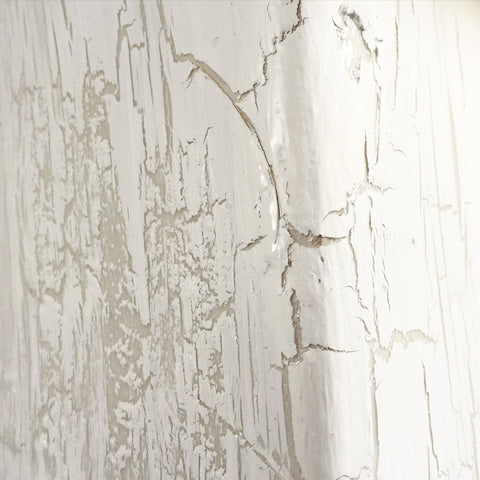
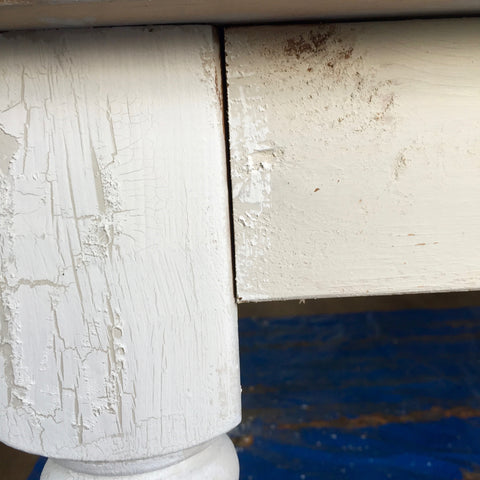
I ran the sander over the edges of the frame, the places that wear would naturally occur from moving or bumping it over time. 


This is the best part about the milk paint, it flakes off in a very naturally-aged way. I kept distressing until I was happy with it.


Isn’t it perfect? I’m so thrilled with the way it turned out. I’m considering antiquing the mirror glass as my next project, but I’m not so thrilled about all the chemicals involved; so I might leave it as-is or find a safer alternative to doing so.


This beauty definitely deserves to be hung up! Hopefully I can get my husband to help with that bit.


Overall this was an easy, quick, fun way to get add an antiqued chippy look for the cottage or farmhouse feel. It wasn't very expensive (I owned all of the materials already except the mirror), and I finished it in a weekend.

As mentioned, I would NOT recommend mixing the milk paint in a nice blender, instead you can hand agitate it in a mason jar, or mix it by hand. You could probably also use an immersion blender. I would also recommend removing the mirror from the frame if possible, or covering the glass while you're painting. I spent a good amount of time with Windex, vinegar, and nail polish remover scrubbing those paint speckles off.  Lastly, be very careful with your sander if you aren't sanding by hand. I scratched a little bit of the glass in some places because I didn't notice the sander was touching it. Oops, that just adds to the character, right?

What do y'all think? Do you have a mirror you’d like to add some cottage charm to? Would you antique the glass as well or leave it as is? I’d love to hear from you! 

xxo,
Tay


href="http://www.sugarandsucculents.com" target="_blank"


**Blog post courtesy of Taylor from Sugar & Succulents. Visit her blog for more DIYs and inspiration!

Apr 6, 2016

The James' Home Tour

Once in a blue moon, an interior decorator gets an opportunity to completely design, decorate, and style an entire home with a clean slate. I recently had this amazing opportunity, for a very special client, where I was able to work with a "blank canvas", and was tasked with the job of decorating their entire home from scratch!  I was able to completely furnish their entire home, on a budget, by using Wayfair for most of all of the furniture, and shopping strategically at all of the major home decor spots like, HomeGoods, Target, Kirklands and many more.  

Now this was no easy feat - here's the list I had to tackle:
  • 4 bedrooms/1 sitting room
  • 4.5 bathrooms
  • Office
  • Formal Sitting Room
  • Formal Dining Room
  • Living Room
  • Dining Room
  • Entryway
 When working on a large project I usually like to tackle it room-by-room, and complete one before starting another! This works best for me and helps me to focus all of my attention on each room individually, making sure nothing is missed or overlooked.

Formal Sitting Room:
I decided to use cool tones and mirrored furniture to brighten up the room and open up the space. Mirrored furniture is a popular trend and is easy to find it in most home decor places you shop. I chose  a white, gray, and navy blue color scheme to create contrast and used different textures to create depth.  I added accents to complement the furniture and added large mirrors and paintings to the wall to complete the look.


Formal Dining:

For the formal dining room I decided on a bold and rich brown oak center table with matching ladder-back chairs. I wanted the formal dining area to make a statement since it was one of the first rooms you see when you enter the home. I laid a wide piece of burlap down the  center of the table to serve as a table-runner which made for the perfect contrast in textures. I added a few stems of flowers to a couple of vases to add pops of color. I set the table with traditional white and gold-rimmed plates and gold chargers for the place settings. I completed the look with a few natural elements including the pine cones styled in the wooden box to serve as a centerpiece and added single roses to each place setting.


Living Room:
My client's wanted a practical and easy to manage decor for the living room, as this is where they would spend most of their time as a family. Having 2 kids, ages 6 and 9, they wanted something that could be easily maintained but also something that could withstand wear and tear and still look modern. I chose a dark tone for the furniture and added a pop of color in the drapes by choosing a mint green tone. I added a patterned area rug to complete the look.


Guest Suite:
I decided on a very modern and chic style for the guest suite. My client wanted a black and white room so I added gold accents to give it a classic and clean look.


Girl's Room:

I wanted to create a room surrounded by the little one's favorite colors, yellow and pink! Chevron prints are all the rage now, so I started with the chevron printed bedspread with pops of yellow.  My favorite pieces in this room are the illustrations of the little brown girls. I found the amazingly talented artist, Evelyse Rosa, on Instagram (@evelyserosadesigns) who does beautiful illustrations and art for only $8/each and she conveniently sends you the file to your email. Once I received the PDF files I just printed them on my own and framed them with frames I found on sale at Michaels. I added a few touches of pinks to complete the look for the little princess.


Boy's Room:
I wanted to do a nautical theme for the boy's room since his father was in the navy. I chose a navy and red color scheme and added nautical accents to complete the look. My clients wanted the kid's rooms to be functional and a place where they liked to spend their time. I added desks and all of the essentials for them to read, do homework, and to play!


Office:
My client wanted a space that was all her own, and somewhere she could retreat on days where she worked from home. It was important to her to have her own office, complete with all of the necessities she needed. I created a space that was both comfortable but also that could double as an extra guestroom; the couch folds out to a full size bed.


Master Suite:
The master suite was the very last room that I completed in the home. I knew that I wanted to create a peaceful and welcoming ambiance for my clients to have a place to come home and relax. I completed this room in two parts. I started with the sitting room first, and then completed the bedroom decor. I wanted to use a bold pop of color for my accent so I chose the jewel tone, amethyst. Jewel tones are a trend now in so many different things and it creates such a statement. I added pops of this beautiful color in the drapes, the area rug, and in the floral decorations that I made.
For the furniture in the bedroom, I chose a platinum color tone to create a contrast in the bold jewel tones, and decided to go with a champagne color for the bedding to bring in more warmth against the cool platinum tones.


Blog post by Chári Herndon - please visit her blog for detailed source info and to see before pics of this project. 
Blog Website: CHICHOMESTYLE.COM
Instagram: @CHICHOMESTYLE 
Email: CHARIHERNDON@CHICHOMESTYLE.COM

Related Posts Plugin for WordPress, Blogger...