


When we purchased the home it was last remodeled in the 1980's and it showed. The worst being the yellow oak cabinets. But of course, it being real wood my husband absolutely would NOT let me paint them. What it is it with men and not being able to paint wood??! Well I had to figure something out. I was never going to get my dream white kitchen.
I learned with this house remodel, sometimes you just have to pick your battles. And this was one of them. This leads me to my next DIY. How to turn your yellow oak cabinets into something beautiful!
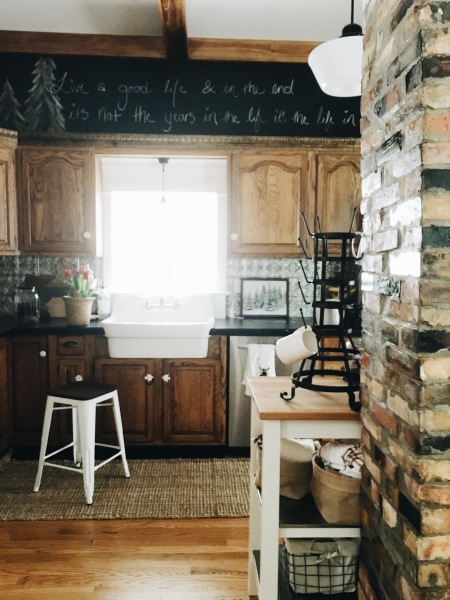
Here is just before we started. (Sorry for the mess, I am terrible about doing good before photos- I just want it done!)

Where to begin.. Lucky for me my dad is very handy and knowledgeable about wood working and led the way. I was nervous how they would turn out, but I learned you have a lot of control with staining. First off, the old finish needs to be removed. Not stripped, just scuffed up enough for the new stain to penetrate the wood.
To do this, the first step is to take 220 sand paper and lightly sand the cabinets. Remember with sandpaper also to go with the grain. Next we took a Scotch Brite scouring pad to further scuff up the old finish. These come in packs and are less than 5$ at the store. I used a Heavy Duty Scotch Brite. After a few hours of scrubbing each door and cabinet, a rag was used to clean off leftover dust and dirt. With a clean and dry surface, we were ready to stain!
Now, here can be the tricky part. Being that the cabinets were not stripped, whatever stain you pick, the cabinets will not be that exact color. Also to note, depending on the stain and how long you let the stain penetrate, this will ultimately affect the finish look. I recommend practicing on a place that won't be easily seen as a test area. I ended up choosing a Dark Walnut Minwax stain. As I said earlier, the longer you let it sit the darker the finish.

After applying the stain with either a rag or a sponge brush, use a clean rag to rub off the stain.
I added this last picture to show what the cabinets looked like after just applying the stain before wiping. Don't let this dark look scare you if this is your first time staining. Most of it wipes off, but the grain in the wood turns darker.


Well, I am not the best picture taker but hopefully you can see the difference! Oil based Polyurethane as it ages tends to turn wood a yellowish color. Because of this, most choose to go with a water base poly, BUT I will say from my experience water base polyurethane does not hold up as well, and in time and requires more maintenance. For this reason, and being that the kitchen cabinets take a great deal of abuse, I chose again to apply the finish coat with an oil based polyurethane satin finish. I believe the oil base polyurethane brings out the grains of the wood. Yes, there is much debate on what to use and which one is better, but ultimately it is a personal preference :)
Thank you for stopping by and let me know if you have any questions!
Have a great day! :)
**Blog post courtesy of Morgan at The White Farmhouse Blog. Head over to her blog for more inspiration!


2 comments:
Looks Beautiful!!!
Wow it’s really looks so beautiful after getting new looks. Kitchen cabinets are most important part of kitchen that makes kitchen looks beautiful and you did it in good way.
Post a Comment